Wednesday, October 7, 2015

Making Fire Cider - Herbal Folk Remedy

[4
Fire Cider Herbal Medicine & More!
Every year when we harvest our horseradish root, I know that the winter cold and flu season is just around the corner and that means it is time to make Fire Cider!

I am not sure of the origins, but I was blessed with this recipe back in my early teen years from a friend of mine that gave me some for a cold I had. It worked so well for me, I make it every year. I find the hot, tart, tangy, kinda warming, taste to be addictive almost.  It definitely helps me fight back colds and flu as I rarely get sick.

The nice thing about it is that not only is it a medicine, but it also makes for wonderful salad dressings, I drizzle some over chicken and fish, and it adds a little zip to veggies.  :-)  It adds a "zip" that really takes things up a notch.  It's really good stuff that is versatile in its use as well.
I love dual purpose things!

If you don't have the time or just want to buy a bottle, I found it for sale here online.

The recipe is simple:

Fire Cider

1 Quart Mason Jar with plastic lid
1 - large onion (I like the Spanish Onions)
1 - 5" piece of Horseradish Root finely diced
1 - 4" piece of peeled & finely diced Ginger Root
6  - peeled and finely diced Cloves of Garlic 
1/2 to 1 teaspoon dried Capsaicin or Cayenne Pepper (From Louisiana is best)
1 bottle of Organic Apple Cider Vinegar with The Mother 

Place all finely diced ingredients into the mason jar, add the cayenne pepper to taste, pour the apple cider vinegar over the ingredients, put the lid on and shake to mix.  Let this sit on your counter for the next 4 weeks, shaking it everyday.

Once the mixture has set for the 4 weeks, I strain it through a double layer of cheese cloth twice to remove any debris.  I want the final product to be free of any solids.

Honey can be added after straining but this is optional.

1/4 cup to 1/2 cup Honey to be added after above ingredients have time to meld for 4 weeks.

I take a tablespoon every day in the morning after breakfast during cold and flu season.

Please Note:  This information is provided for educational purposes only.  I am not giving medical advice, medical treatment or medical care to or for anyone.  Before using or taking anything, one should consult with their own health care professional.  I make no warranty, claim or guarantee as to the effectiveness of any treatment described or found herein.  
  

Monday, October 5, 2015

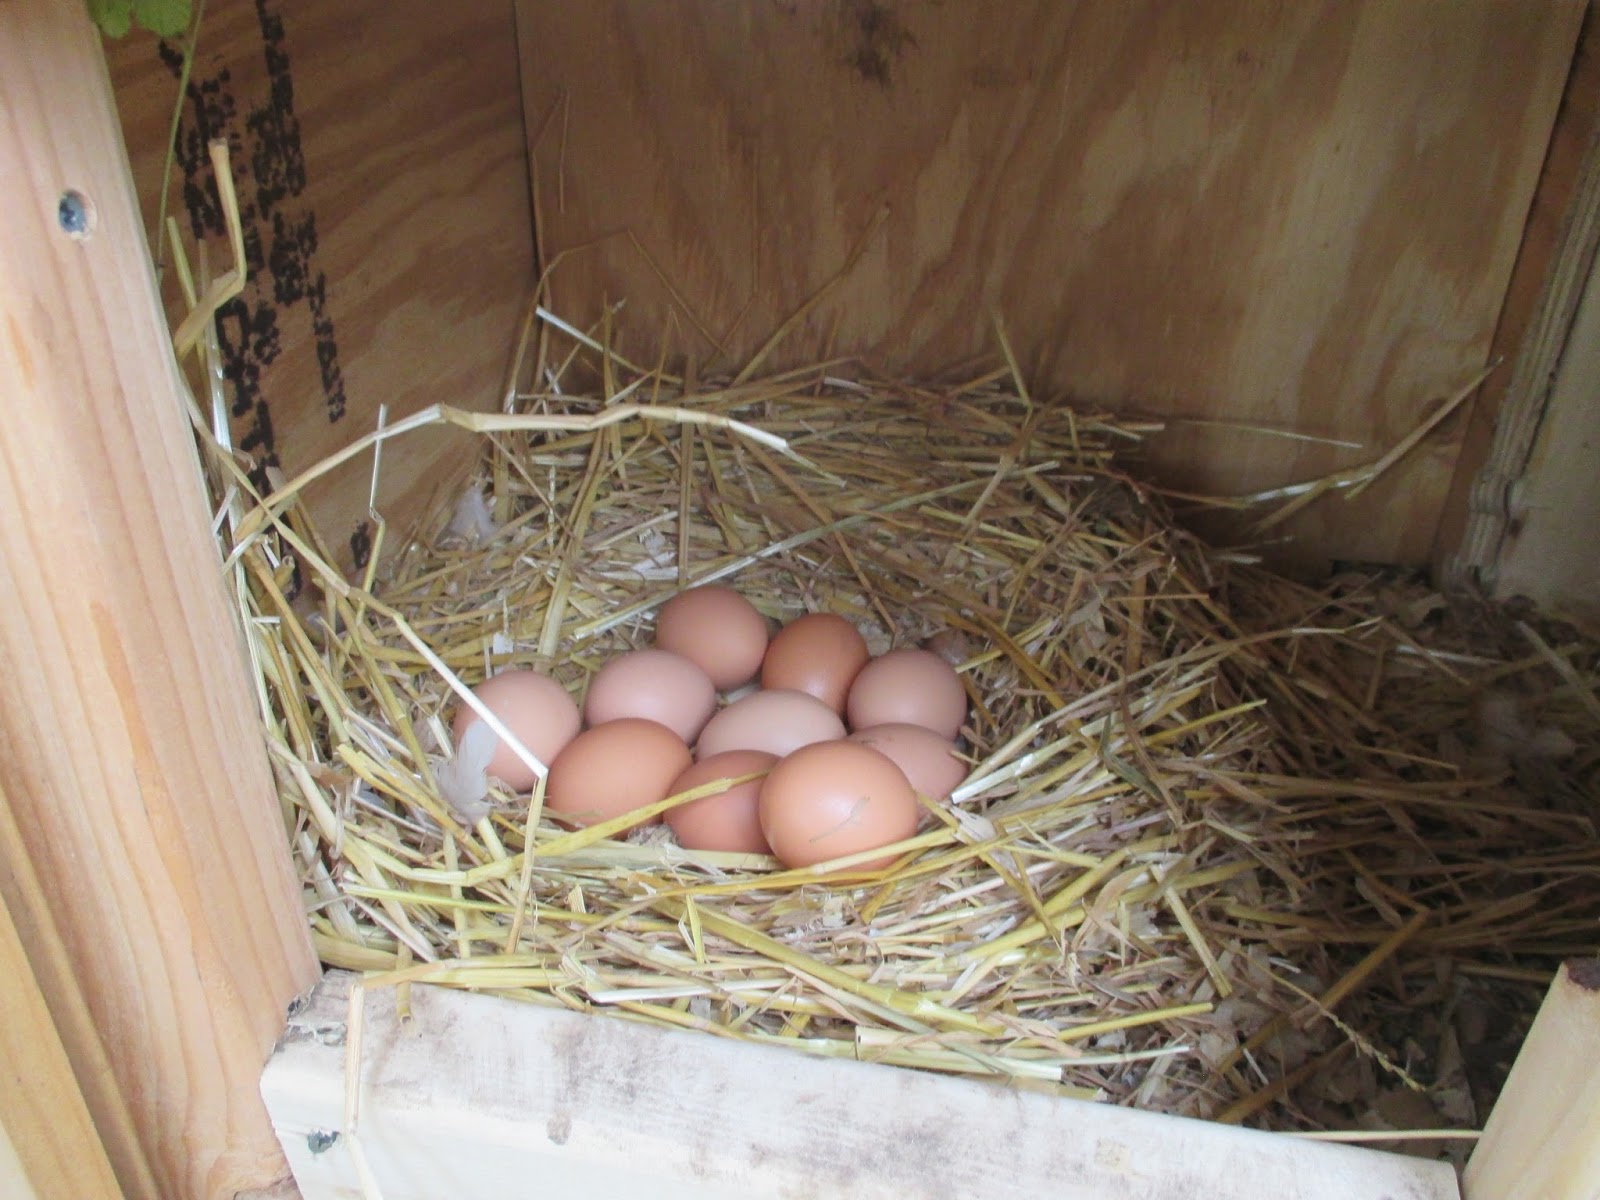
What Are The Actual Costs For A Dozen Chicken Eggs?

Let's face it, most of us don't have chickens to make money from selling the eggs.  If that were the case, chicken eggs would have to cost a lot more than what our local market will pay or there would not be anyone selling farm fresh chicken eggs!  Most homesteaders that have and raise chickens do so for many reasons.

Some of those reasons may be:
  • We want to know more about where our food comes from.
  • We want to know what and how that food source is taken care of.
  • We want to know what our food source is consuming because ultimately the things the animals eat will end up in the end product from our livestock.
  • We want to know that "Free-Range" means they are actually out on grass eating bugs, scratching for seeds and are doing things that chickens do naturally.
  • We want to raise and replenish our livestock naturally.
  • We want to be able to have our own source for protein.
  • Chickens and their eggs are cheaper sources of meat protein.
  • Chickens require less land to raise them on.
  • More communities allow hens in residential neighborhoods\acreage isn't required. 
  • The housing needs of chickens are fairly minimal.
  • We do not like to hear how chickens are treated in commercial environments.
  • We want our children to know where an egg actually comes from.
  • We like our food to be as fresh as possible.
  • We love having chicken TV outside our windows for non-stop, free entertainment.
  • We want our garden soil enriched with chicken poo.
  • We want our garden soil naturally excavated, fertilized and turned at the end of the season.
  • We want natural bug control.
  • They sell eggs to off set the cost of having a flock of chickens.
  • They want to provide family members with farm fresh eggs.
The reasons are many!   

Most of us are "accidental" egg sellers.  We end up selling eggs because we have more eggs being produced than our family can consume.   

In order to calculate the actual costs involved in producing a dozen eggs, we have to breakdown more than just feed costs.  Below is how I figured out what the true costs of producing a dozen eggs:

Coop Costs w/labor  $1,500 divided by life expectancy 15 years/$100/yr by 365 = $.28/day
Cost for a Layer Hen $25.00 Laying Time 2 Years $12.50/yr/365 = $0.32/day
Straw and Pine Shavings for Coop/Nest box Cleaning Weekly $15/mth $0.50/day
Fencing & Fence Posts $85.00 Life Expectancy 15 yr $12.33/yr x 365 = $0.04/day
Electricity (lights/water/ heater) 6 months/$8.00/mth by 30 days = $0.26/day
Solar Predator Protection System & Hawk Netting on Run $185 5yr Life Expectancy $0.10/day
Layer Feed Daily Cost $0.73 per day to feed 12 Hens 
Real Estate Taxes  (broken down by acreage, then by acre and by 1/4 acre = $2.50/day)
Farm Liability Insurance $0.24/day
Egg Cartons and Required Labeling Cost  $0.32/each 
Automobile Gasoline/Expenses to pick up feed month $3.00/mth = $0.10/day

All of these expenses add up to $5.39/day divided by 12 = $0.45 per egg x 12 = $5.40/dozen

As you can see, there are no wages collected for cleaning the coop, feeding the chickens, collecting the eggs, refrigerating the eggs, keeping paperwork on the eggs, feeding the chickens, getting up to let them out, being home to lock them up, for medical supplies, for DE, feed storage, mouse control costs, treats or medical treatment......

Obviously your costs and expenses would be different than my costs and expenses.  I would not be able to get anywhere close to $5.40/dozen in my area but then again, I do not have chickens to sell eggs.  I have chickens for our family's consumption and for my entertainment & enjoyment.  

I wanted to know what it costs to bring a farm fresh egg to our table.  At a cost of $0.45 an egg, I'd say that is a heck of a deal just to know my girls are well cared for, eat healthy, are in a clean environment & are just plain ol' chickens allowed to be and act like chickens! 

Have you figured out what it costs you to provide your family with delicious, nutritious Farm Fresh Eggs?  I'd love to know!

I posted why I sat down and spent my time calculating costs on BackyardChickens.com - Here is a link to that post - Click Here!


Sunday, October 4, 2015

Harvesting & Growing Horseradish

It's that time of year that I harvest some of my Horseradish to make both culinary and medicinal delights for the winter months.  We have transplanted our plant stock that I have been growing for over 25 years to our new homestead this last week. I thought now would be a great time to write a little about this wonderful, diverse and highly underrated perennial.  

Here is a little background information on growing and using Horseradish I thought may be of interest to you.  

In Spring, the tender, edible leaves emerge from their Winter resting period.


Growing Horseradish:

Horseradish is a perennial that is best propagated by root cuttings. Horseradish is hardy to zone 5 and in other areas, it may be grown as an annual.  Horseradish root stock must be planted in amended soil with compost.  Horseradish prefers afternoon sunshine with a little shade. Horseradish also benefits from frequent watering - the plant prefers a moist soil but not wet or soggy soils. Horseradish can be planted in full sun which helps horseradish to survive but horseradish will do well with afternoon shade especially in areas that are hot, and or dry.  Once you get Horseradish established, it is pretty much one of those plants that you don't need to fuss over.  They are quite hardy I have found.

One of my Horseradish Plants Just Before Harvesting
Harvesting Horseradish:

The best time to harvest Horseradish is after the first hard frost and the leaves are dying back.  If the ground has frozen, you can overwinter horseradish.  In the spring before the plant begins to actively grow, you can harvest it at that time too if you wish.


Storing Horseradish:

Horseradish roots should be stored in a cool, dark location so the root does not spoil.  Whole root stock may be stored up to 3 months if kept in a ventilated plastic bag inside of a refrigerator.  They can be stored in a root cellar or buried in moist sand.  Horseradish may be frozen and used for culinary purposes later.  

Culinary Uses:  

This Root I harvested in early Spring 2015.

Horseradish Root is used to make condiments, as a spice and for seasoning.  Horseradish contains potassium, phosphorus, calcium and magnesium, are fat-free and rich in vitamins A & C. Horseradish loses nutritional value when cooked so it is best used raw. The most common uses for raw Horseradish are for cocktail sauces, dips, dressings, numerous condiments like horseradish mustard, horseradish mayonnaise, or added into cheese spreads.  

Horseradish loses its pungent punch when heated.  Using fresh is always preferred but prepared, store bought is at times necessary and acceptable to use in many recipes.  The ratio of prepared, store bought Horseradish to using fresh grated Horseradish is 4 prepared to 1 fresh.  

Other herbs that pair beautifully with Horseradish are bay, chives, garlic and mint.  

In the book, Uncommon Fruits and Vegetables, a Common Sense Guide by E. Schreiber, suggests to "throw out the rules and add a little horseradish to everything!" 

When I add Horseradish, I make the addition to "taste" and not so much by measurement.  I truly enjoy the addition of Horseradish Cream to liven up a sandwich - it adds punch to an otherwise dull roast beef  or grilled cheese sandwich.  Here's the recipe:

Horseradish Cream
1/4 cup creme fraiche or sour cream       
1/4 cup plain yogurt or mayonnaise                                                        
1/2 TBSP Horseradish  (to taste)
1/2 TBSP Fresh Chopped Dill      
Salt and Pepper to Taste        
1/2 Tsp Lemon Juice (optional)

Measure and mix all ingredients in bowl.  Store covered in refrigerator for up to 3 days.  Can be used as a dip for veggies and/or chips.

   
Medicinal Uses:

Long before Horseradish became popular as a ingredient in the kitchen, it was used for medicinal purposes from sore throats to digestive tract issues, for the treatment of asthma, arthritis, toothaches and cancer.  Horseradish is known for its diuretic and circulatory properties.  

Native American Indians used Horseradish for toothaches and menstrual cramps.  The ground root was applied to the skin and applied to the skin for circulation.  Tonics were made to treat congestion, sore throats, hoarseness and as an expectorant for colds. 

Today the medical field utilizes an enzyme present in Horseradish, referred to as HRP, as a tool for detecting antibodies.  Research is being conducted to explore possibilities that compounds found in Horseradish can be used for the prevention of cancer.   

One must be cautioned that large doses of Horseradish can cause irritation to the stomach lining and may cause vomiting if you over do it.

Wasabi, which is sometimes called Japanese Horseradish, is another cultivated plant that enjoys the culinary addition of "heat" though many argue Wasabi has a more pungent hot flavor, others folks argue that Horseradish provides more heat.  What many don't know is that Horseradish is often dyed green and used as a substitute for Wasabi!  

The Horseradish Plant not only provides beautiful foliage to a landscape, it provides a wonderful medicinal food source for folks to enjoy. 

Fall is the best time to plant Horseradish plants.  Look for a root in the organic section of your local grocer or at the farmers market that has a bit of green on the crown.  Plant the root with the crown up it in a moist but not wet area and wait till next fall to harvest some of this wonderful plant.

(You guessed it, I am getting ready to make some things with Horseradish!)

   
DISCLAIMER:  Please note that I am not a doctor nor am I recommending any herbs or plants for medical or health purposes.  The information contained herein is given as educational purposes only and should not be considered as or a recommendation of any particular medical or health treatment.  Always check with your health professional before using any herb or plant as a treatment or health treatment.


Monday, September 28, 2015

Our Storage Solution for Organizing and 

Storing Herbs & Spices


At our last home, like most folks, I stored my herbs and spices in a cupboard by the stove.  The problems I had with doing that was:

1.  Difficult to find the spice or herb I needed.
2.  The cabinet was too small and "overfilled".
3.  Constantly had move jars and re-arrange.
4.  The cabinet was too close to the stove.  
     (Herbs and spices should be stored in a cool, dry and dark area.)
5. The cabinet was difficult to keep organized.

I purchased a lot of items I thought would help improve my dilemma like those stepped spice storage shelfs. While they worked for the small jars, they did not fit the large jars so I made my own "stepped" spice rack for the cupboard that really did nothing more than lift the containers up but still forced me remove the jars and stepped plastic shelves to get to the spice jars behind them!

 That absolutely drove me crazy.  I was so limited on storage and cabinet space, I did not have much choice.  When we decided to build the new homestead, I made a detailed list of things the new house had to accommodate in a more "user friendly" manner.   Spice storage was on that list!


Here is my solution to my Spice & Herb Storage Issue: 
We built and added this spice storage rack inside one of my new pantry doors - 
What an improvement!  

I organized the herbs and spices by color instead of alphabetically.  
I just find it easier to find them this way.

Spices and herbs I rarely use, I keep on the bottom tiers.


Here is a close up of the spice shelf that we attached to a stain grade piece of 
plywood which is glued to the plywood and then screwed from behind & then
screwed securely into the pantry door.  


   For the spice jars, I wanted everything to match, so I purchased these 
wonderful Weck Jars to store my spices and herbs in.  They fit beautifully without
worry they could fall out.

On our pantry door, we measured the space inside the door handle 
and from where I wanted the top and bottom of the spice rack and cut the plywood to those 
dimensions.

We bought the spice shelves from IKEA 
(Here is the link to them: IKEA Spice Shelf )

We put the spice shelves together, wood glued and screwed them to the plywood, 
stained the plywood and spice shelves and after they were dry,
we screwed them to the inside of the pantry door.

Having my herbs and spices finally organized and easily accessible has really
made meal making so much more enjoyable - I actually know what I am low on and I
know which ones need to be replaced.  

Organizing the spices have really increased the time 
spent on getting dinner on the table!

Do you have this same kind of issue with your spice storage?  
If so, this may be a solution that could work for you!

As Always,
Thank you for your support &
for
Stopping By!

Lori
Back to Basics Gal


CONTEST ALERT FOR $1000 WORTH OF FREE AMMO!


US CONCEALED CARRY ASSOCIATION 
IS HAVING A DRAWING FOR
5 LUCKY FOLKS TO GET 
$1,000 WORTH OF FREE AMMO!

HERE IS THE LINK TO THE CONTEST ENTRY FORM:


GOOD LUCK!

Saturday, September 26, 2015

Food Preservation 2015 Book Giveaway!

 DIRECTIONS ON HOW TO ENTER

the Food Preservation 2015 END OF SUMMER Book Giveaway!


 It's a little late in the season but I guess it's better late than never as the old saying goes.  We are still trying to get settled so things like the blog and Youtube have been few and far between. I would love to be able to give each and every sub a prize but alas, that is not a possibility!  I am trying to make this as simple as possible to keep track of folks who want to enter so below I am listing what I need you to do to have your name drawn....


1.  You must be a subscriber to my YouTube Channel.
2.  The drawing is only open to residents of the USA.  (Sorry but shipping out of country is not in my meager budget at this time!)
3.  Please, ONE entry per person so more folks will have a chance.  (Choose the one book you would want the most); They are all great books!

Book #1 - PUT EM' UP FRUIT  

   Book #2 -  CAN IT!  


Book #3 - GROW. COOK. PRESERVE.

  Book #4 - The Art of Preserving 

4.  Entries will be accepted starting today, September 26th, 2015 and up until October 21st, 2015 at midnight.  Sorry, entries received after that date will not be entered.
5.  You must enter here on my blog, Back to Basics & Homespun News, Simply include your YouTube Name and the number (1 through 4 above) for the one book you would like to be put in the drawing for - Remember, one entry only per person!  Duplicate entries will not be honored.
6. The winner(s) will be drawn sometime during the week of Halloween (October 25th through October 31st, 2015) - This should allow you enough time to see the contest and get your entry in.
(This timeframe will also allow me enough time to check the entries and get them ready for the drawing!)

IF YOUR NAME IS DRAWN:
I WILL ANNOUNCE IT ON THE  YOUTUBE DRAWING VIDEO.  
AT THAT TIME, I WILL ASK YOU TO PROVIDE ME WITH YOUR MAILING ADDRESS, (no post office boxes please, I don't think tracking will work with PO Boxes) and  your                   EMAIL ADDRESS.
(PLEASE, DO NOT PUT THAT INFORMATION ON YOUR ENTRY!)

PLEASE NOTE: Your privacy is important to me.  The information you provide 
will only be used to send you the book you won and your email used to send you 
information pertaining to this drawing.  

If I DO NOT RECEIVE THE INFORMATION FROM THE WINNER WITHIN 
3 DAYS of THE DRAWING VIDEO, THE PRIZE WILL BE FORFEITED &
ANOTHER DRAWING WILL BE TAKEN. 

I hate sounding so HARSH but holding a drawing is a lot of work and I want the steps clearly stated so everyone has an opportunity to enter & everyone is clear on the rules.

Thank you so much for your support.  It is appreciated more than you could possibly know!

Best of Luck to All.
As Always, Thanks so Much for Stopping By!

Saturday, September 5, 2015

Are You Eating Real Cinnamon?


While trying to find some Ceylon Cinnamon sticks online, I happened upon some health related information I thought needed to be shared.  Here is what I found:

Who knew there is only one "true" or "real" cinnamon? 

I had been buying Ceylon Cinnamon simply because I preferred the more delicate taste to that of the Saigon Cinnamon I had purchased. I noticed there was a slightly higher price for Ceylon Cinnamon which I thought was because it must have been more expensive to harvest, maybe it was more difficult to harvest or something along those lines. There is a difference in the taste between cinnamons being sold on the market.  I found the Saigon Cinnamon leaves an aftertaste and is a little bitter tasting.  I did not know any information about the health risks between the different "cinnamons" on the market.

All types of cinnamon share certain characteristics such as they are antimicrobial, inhibit the growth of fungi and yeast, and help regulate blood sugars.  Where the huge difference is from a health standpoint is the amount of Coumarin they have.

"True" or "Real" Cinnamon is called Ceylon Cinnamon which is grown in Sri Lanka and is sourced from the plant Cinnamomum Zeylanicum.  Ceylon Cinnamon has a sweet, very delicate, milder smell, offers a brighter, almost citrusy taste. It does not have a bitter after taste.
Saigon and Cassia Cinnamon offer a stronger, pungent, hotter taste and a stronger, bolder scent than Ceylon Cinnamon.

The most common type of spice we find here in the United States and in Asia being sold as cinnamon is either Cassia, which is also known as Chinese Cinnamon and Saigon Cinnamon.  Cassia comes from a plant called Cinnamomum Cassia or Cinnamon Aromaticum, a totally different plant than true cinnamon comes from.  Likewise, Saigon Cinnamon comes from an evergreen tree in the genius Cinnamomum which is indigenous to Asia.  Both of these types of "cinnamon" have a high amount of Coumarin which has strong blood-thinning properties and can cause liver and kidney damage over prolonged use.

A published study by the Journal of Agricultural and Food Chemistry tested cinnamon commercially available in the United States which found "Substantial Amounts" of the naturally occurring organic compound Coumarin which can cause liver damage if consumed in excess.  Coumarin is found naturally in many edible plants like strawberries, apricots, cherries, and black currents,  Coumarin was banned as a food additive in the United States in 1954. This same study found only trace amounts of Coumarin in Ceylon Cinnamon.

European health agencies have taken steps to warn their population of the dangers of consuming excessive amounts of Cassia Cinnamon due to its Coumarin content.

According to the German Federal Institute for Risk Assessment, 1 Kg of Cassia Cinnamon Powder contains 2.1 to 4.4 g of coumarin.  Based upon the weight, the report concluded that one teaspoon of Cassia Cinnamon contains anywhere from 5.8 to 12.1 mg of coumarin which is above the tolerable daily intake level - the report cautions against high daily intakes of foods containing coumarin and specifically states that Ceylon Cinnamon contains "hardly any" coumarin.


Ceylon Cinnamon on left
Ceylon Cinnamon is highly valued as a culinary and medicinal spice and is also more expensive than other cinnamon being sold such as Cassia/Chinese Cinnamon and Saigon Cinnamon.  Ceylon Cinnamon sticks are lighter, tannish in color, have numerous layers in the sticks, are easily broken up and easily ground into powder.  Cassia and Saigon Cinnamon sticks are reddish brown, have thicker and fewer layers, and are very difficult to grind up even with a blender or chopper.

You can find  in some grocery stores, at some health food stores and of course, online.  I purchase my Ceylon Cinnamon in sticks and grind them as needed.

I hope you found this information useful.  As Always, Thanks for stopping by!


Wednesday, August 7, 2013

My Laundry List...

Every year, one of my sisters hosts the other 7 sisters for a week end that we refer to as "Sisters Weekend".  Everyone comes in town to spend 3 days filled with food, gifts, fun and laughter.  It has become a tradition to bring some kind of gift, usually homemade, for the other girls. 

As a couple of examples, one of my sisters enjoys sewing; she enjoys making quilts so she will make things like neat fabric bowls, or beautiful quilted pot holders.  Another sister seeks out something unusual yet useful.  She is very thoughtful with her gifts and goes over the top in finding the perfect wrapping for the gift.  Another sister loves ceramics so she spends the winter months making every one a special item like a snowman tower for Christmas or a Platter for Easter - it is always something thoughtful as well.  You get the idea.  Anyway, I find it a challenge to figure out something creative and fun to give yet useful while not spending a fortune. 

This last year, my sisters received what I called a "Laundry Stain Basket".  Below is a picture of one of those baskets before I had filled the containers.  I never thought to take a photograph of the finished baskets but this will give you an idea of what they looked like anyway.
 
I included a bar of Felznaptha Soap, a bar of Zote Laundry Soap, a bottle of Peroxide, and a couple of spray bottles.  I filled some containers with Washing Soda, Baking Soda, a small bottle of white vinegar and Borax.   I included a couple of funnels, a couple of soft bristle brushes, a sponge, a scrubbie, a measure cup, the recipes for homemade laundry soap and I made a Natural Stain Chart and laminated it for them.  I found the cute miniature style laundry baskets at the dollar store as well as a couple of containers I used. They looked really cool.
 
Everyone seemed to like the basket filled with what I felt were useful items that would be useful to them.   
 
If you would like a copy of the stain guide, just PM me on YouTube and I will send you a copy. 
(I could not find any way to include it here!)
 
As always, thank you for stopping by!


Tuesday, June 11, 2013

Avoiding Boredom with Backyard Chickens...
Alfalfa Feeder (AKA Suit Holder)
Today the rain just would not stop! It was pouring down rain -  thundering, lightening, and the yard was filled with puddles. I hated leaving the girls cooped up, but I do during inclement weather.

I take a few treats out to them through out the day to keep them busy like cabbage, some watermelon, cherries, apple slices, strawberries, some veggies, some earthworms, a few meal worms or a few greens.  They get plenty to eat - I worry about boredom.  I am concerned if they get bored, they will start pecking at each other and fighting - I am trying to avoid that issue.  I have made a few "Chicken Toys" for the girls to keep them occupied - they actually work I think!  Anyway, I change them out so they won't get used to them. (The ones I have filled with scratch grains, I change what grains I put in it for them - its ever-changing!)

Lately, I have read some people give their chickens a bale of alfalfa to pick at and it keeps them busy.  I liked the idea but I use straw over the sand to make cleaning easier.  I like the straw for the compost pile - I did not want to encourage eating poo-covered bedding. I decided I would just buy a small hay feeder and hang it inside the pen - problem solved.  It would also give them something to peck at without having to get it off the water-soaked ground.

Since the girls were penned up today, I went to the feed store today to get the alfalfa and holder. I bought a bale of alfalfa but the hay feeder was just too much money I thought for a couple of pieces of wire.

After leaving the feed store, I went to Tractor Supply. There I found a large suit feeder; I think it is actually for feeding squirrels - it was less than $5.00 - I could make that work.

I got home, filled it with alfalfa and hung it inside the pen. I video taped the chickens reactions. As always, anytime something is added that is new, the girls talk about it first, then the big girl approaches, checks it out, and once she is comfortable, the others come up to check it out. 

Adding the suit feeder as a hay feeder kept them busy for quite awhile this afternoon.  I will keep it as part of their feeding regimen they liked it so well.  I will also be able to fill it with other goodies and treats.  This idea is a keeper!

Note: I ended up screwing it to the divider of the pen and attaching it with a metal bracket so it is securely hung.  The chickens managed to pull it down so I had to re-secure it!


Saturday, June 8, 2013

Old Time Golden Syrup (A Good Honey Substitute!)

This recipe is pretty simple to make but it does require about 45 minutes to make, a good gram scale, an accurate candy thermometer and a heavy-bottom stainless steel pan.  Note: You cannot make substitutions with this recipe!

For this recipe, you will need:

800 grams of white granulated sugar               290 grams of filtered water
2 or 3 organic lemons (You need 6 Tablespoons of squeezed lemon juice)  Wash skins well. 
Quarter the lemons and Squeeze through a sieve to get 6 tablespoons of juice.) 
2 tablespoons of white vinegar

You'll also need 1/4 teaspoon of Baking Soda mixed with 2 tablespoons of water.  Set this aside until the end!

Place pan with candy thermometer on the stove and add water and sugar only to the pan. Bring water and sugar to a boil stirring constantly until dissolved.  Once dissolved, turn heat down to medium high heat and add lemon juice, quartered lemons, and the vinegar.  Stir occasionally so it doesn't burn. The mixture subtly starts turning a beautiful honey color as it reaches temperature. Keep cooking until the mixture reaches EXACTLY 226 degree Fahrenheit or 108 degree Celsius.  (The mixture will be extremely HOT, be careful!)  Once to temperature, take off heat and stir in the 1/4 teaspoon of baking soda mixed with 2 tablespoons of water; make sure you incorporate it well.  Bubbles will be on the surface of the mixture but once it cools, they will dissipate.

Once cooled, place in jars and keep in refrigerator.  This syrup keeps refrigerated for about 2 months.
I'd love to hear how you use your Golden Syrup.  I will be posting here how I use mine as a substitute for honey in different recipes. 

Thanks for stopping by!


Friday, June 7, 2013

How to Make Depression Era Malted Milk Powder


I wanted to add a few additional notes on how to make Malted Milk Powder and its uses.  In order to clear up any confusion on what kind of barley to use.   You need to use "whole barley"; you need to make sure the barley has not been processed and is still in its "husk" - it would be able to be sprouted and planted; I usually call it "whole barley" or "seed barley" when trying to locate it.  (It looks similar to wheat berries or wheat seed you use to sprout wheat grass.)

 
Here is a photograph of the barley seed soaking (in background with coffee filter on jar) and the whole seed to the right of the photograph.


Here you can see in the above photographs the seed after a "rinse" being put back into the jar and the other 2 photographs show the "barley seeds" and how they actually release bubbles while they are soaking.  They are very active and smell really good while they soak. (Remember to keep them covered with a paper towel or a coffee filter to keep bugs and dust out of them.)

I soak anywhere from 1 to 2 cups of barley seeds at a time in a quart mason jar.  You need to rinse them while soaking in the morning and then again in the evening.  I always use my reverse osmosis water which is about the same as filtered water.  (I would not use city water with the fluoride & chlorine additives.)  They need to soak for 2 days; on the 3rd day, rinse them again and place in the dehydrator at about 115 - 120 degrees or in an oven at the lowest temperature possible - be sure to stir them around and do not let them burn.  You just want to dry them out to make them into a "flour" or "powder".

 
Once you take them out of the dehydrator or oven, (my dehydrator dried them overnight), I place mine in my Vita Mixer to turn into "flour".  You can try using a spice grinder, flour mill, food processor or even a blender.  The barley seed is not a very hard grain.
 
Once you "flour" the barley seed, I put about half of the barley, or about 6 tablespoons of "flour" or "powder" into a bowl.
 
 I put the rest of the "powder" in a marked mason jar without adding anything to use later. 
 
To the bowl I then add about 1/4 cup of granulated sugar* (you can use organic, raw or cane sugar) to the "flour" and then I add 2 cups of powdered milk. 
(* Sugar is to taste.  You can add less or you can add more.)
 
I like my malted milk made with low-fat milk - I use a couple of tablespoons to a glass.  You can mix the malted milk powder into water if you prefer, add it to ice cream with a little milk for a malted shake, add it to a smoothie or even add it into your yogurt - it is very versatile! 
 
Homemade Pancakes made from your homemade mix (recipe follows)

1 c. pancake mix (see below)
1 large egg
1 c. milk
1 tablespoon of butter
* Optional - 1 tsp Cinnamon
Directions:

1. In a large pan, melt the butter so that it covers the bottom of the entire pan.
2. Once the pan is heated, put about a 1/3 c. of the batter into the pan and let it cook until you see bubbles on the surface.
Once you see bubbles, the pancake is ready to flip over; allow the pancake to cook on the other side until it is golden brown. Serve hot with maple syrup!

HOMEMADE MALTED PANCAKE MIX  (Makes a nice homemade gift too!)

Mix the following in a large mixing bowl until thoroughly mixed together:

4 cups flour
1/2 cup Malted Barley Powder Drink Mix  (Homemade or Carnation Malted Milk)
3 Tbsp Baking Powder
2 Tsp Baking Soda
2 Tbsp Granulated Sugar
1 Tsp Salt

Store the Malted Pancake Mix in an airtight container.

I hope you enjoyed this & it helps to clear up any confusion!  Please comment, subscribe & visit often!  :-)


Sunday, May 5, 2013

Austerlorps & Ida Browns - My Choice of Chickens

This year when it came down to stocking the chicken coop, I wanted to make sure we had chickens that met certain criteria.  We wanted the chickens for egg laying.  We were not looking for meat birds and until our house is built and the new coop is built, we only have space for a few chickens.

In January of this year, I began researching the breeds of chickens that were easily available around where we live that were advertised.  I found a lot of people had Leghorns, Barred Rocks, Rhode Island Reds, Buff Orpingtons and Black Jerseys plus a few Sex-Links. 

I wanted to know what breeds of chickens are best suited for cold climates - We aren't as cold as Alaska but Michigan does get cold!  A lot of people locally put heat lamps in their coops.  Personally, I do not want to worry about the chickens not being able to adjust if we had a power outage.  In the area we are in, we have gone without power for as long as 6 1/2 days.  I do not want to worry about having sick or frozen chickens! (More about those thoughts later.) The more I read about the breeds, the bigger my list became of the necessary traits and features the chickens we picked needed to have. 

Here was my List:
  1. Cold Hardy - A Must   2. Brown Eggs   3.  Medium to Large Eggs 
     4. No terribly "flighty" breeds          5.  "Quieter" Breed of Chicken         

    6. Not easily spotted by flying predators  (We have to worry about over-head kills here! White   chickens in my opinion are way to visible.)

    7. Good Layer             8. Does well confined (These chickens will not be free ranged)


After reading and talking with a lot of area chicken keepers, I ended driving about an hour north to a farm and picked up some Black Australorps and a couple of Ida Brown Chickens - Both are really good layers of brown eggs, averaging 1 egg a day during their egg-laying years.  Periodically I will post on our progress.  So far, so good!


Black Australorps & Ida Browns